Need to shape aluminum rods for your design but worried about getting it right? I know achieving accurate bends without defects can seem challenging if you lack experience or the right setup.
From my background supplying custom aluminum parts, bending aluminum rod involves specific techniques and understanding the material. Its difficulty depends heavily on the alloy, temper, diameter, and desired bend radius, but it’s definitely achievable with the right approach and knowledge.
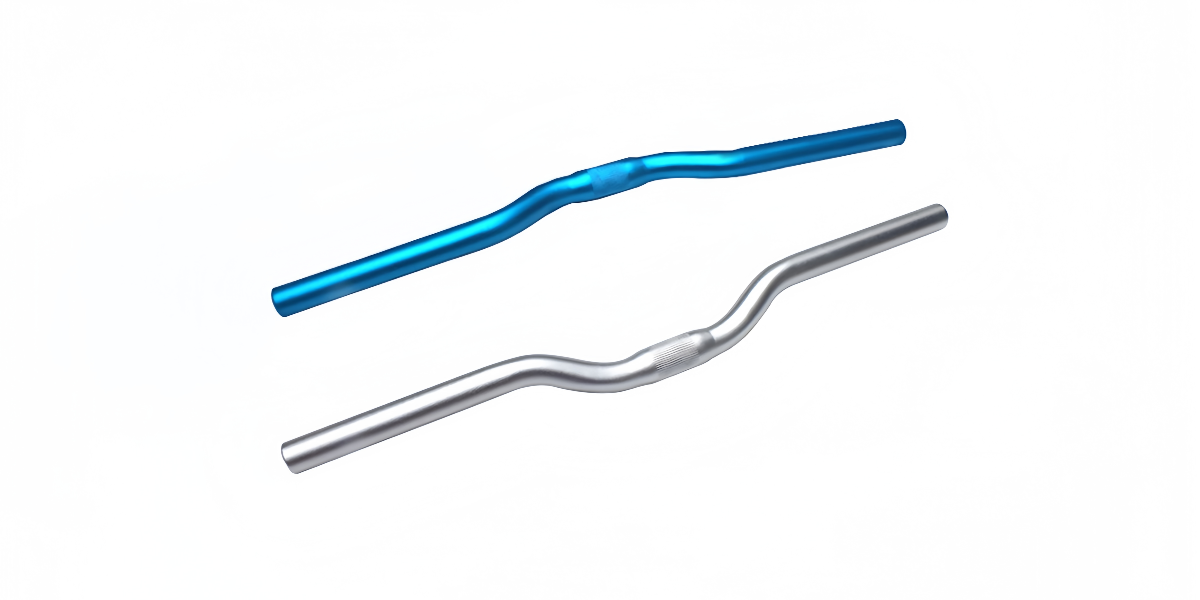
Successfully bending aluminum rod opens up many uses, from structural elements and frameworks to decorative pieces and functional components. Let’s look at how hard it really is, the tools needed for success, common pitfalls to avoid, and the limits on how tightly you can bend these versatile rods.
How difficult is bending aluminum rods accurately?
Starting a project involving bent rods can feel intimidating. How hard is it to get those precise curves without ruining the material? I often discuss this with clients planning their designs.
In my experience, the difficulty varies greatly. Bending soft, small-diameter rods to large radii is quite easy. However, accurately bending harder alloys, larger diameters, or achieving tight radii requires more skill, proper tooling, and careful control to prevent issues.
The perceived difficulty of accurately bending aluminum rods depends significantly on several interconnected factors. It’s not a simple yes-or-no question; the task exists on a spectrum from relatively straightforward to quite challenging, demanding specialized knowledge and equipment at the higher end.
Factors Influencing Bending Difficulty
Aluminum Alloy: Different aluminum alloys possess vastly different mechanical properties that directly impact their formability.
Softer Alloys (e.g., 1100, 3003): These alloys have low yield strength and high ductility (elongation). This means they deform easily under less force and can stretch considerably on the outer bend without cracking. Bending these is generally considered easy.
Medium Strength Alloys (e.g., 5052, 6063): These offer a balance between strength and formability. They require more force than the 1xxx or 3xxx series but are still readily bendable, especially when in softer tempers.
High Strength Alloys (e.g., 6061-T6, 2024, 7075): These alloys are significantly stronger and less ductile. They require substantially more force to bend, are much more susceptible to cracking (especially on the outer bend radius), and necessitate larger bend radii. Bending these accurately and without defects demands robust equipment and careful process control.
Temper: For any given alloy (especially heat-treatable ones like 6061 or 6063), the temper (hardness/strength level achieved through heat treatment or work hardening) is critical.
‘O’ Temper (Annealed): The softest, most ductile state. Always the easiest temper to bend for any alloy.
T4 Temper: Solution heat-treated and naturally aged. Offers a good compromise – stronger than ‘O’ but still significantly more formable than T6.
T6 Temper: Solution heat-treated and artificially aged for maximum strength. This process significantly reduces ductility, making T6 the most difficult common temper to bend.
Rod Diameter: Larger diameter rods inherently require more force to bend than smaller diameter rods of the same alloy and temper, simply due to the increased amount of material being deformed. The bending equipment must be appropriately sized for the force required.
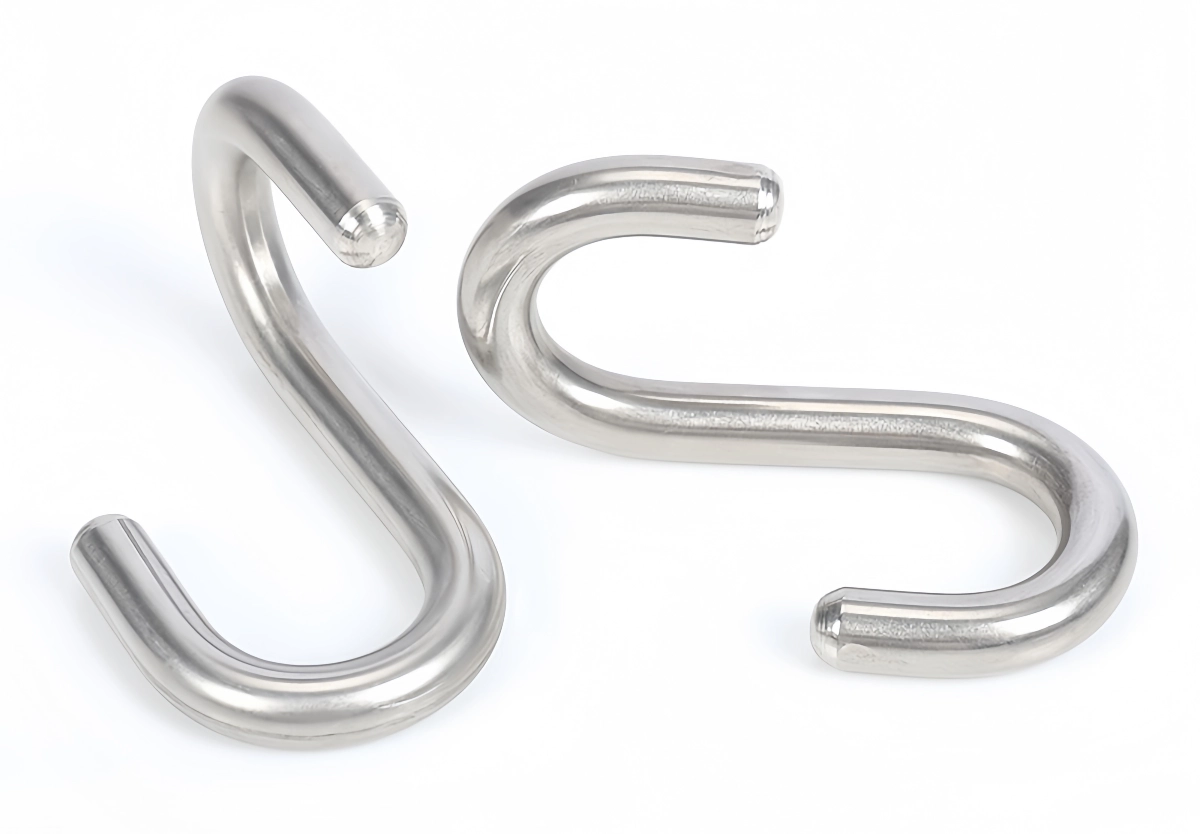
Bend Radius: Attempting to bend a rod to a radius tighter than the material can handle for its alloy, temper, and diameter is a primary cause of difficulty and failure (cracking/fracture). Tighter bends induce more strain on the material. Achieving very tight radii accurately is always more difficult.
Accuracy Requirements: Bending a rod to an approximate curve is easier than achieving a precise angle and radius with tight tolerances, which requires more sophisticated tooling and measurement.
General Difficulty Levels
We can summarize difficulty conceptually:
Scenario
Difficulty Level
Key Challenges
Small diameter, soft alloy (3003-O), large radius
Easy
Minimal force, low cracking risk
Medium diameter, medium alloy (6061-T4), moderate radius
Large diameter, hard alloy (6061-T6), tight radius
Difficult
High force, high cracking risk, requires precision
Therefore, while bending aluminum rod can be easy under favorable conditions, achieving accurate bends in stronger alloys, larger sizes, or to tight radii presents significant challenges that require appropriate knowledge, tools, and techniques.
What tools are used for bending aluminum rods properly?
Knowing bending can be tricky, what tools do I actually need to do it correctly and avoid damaging the rod? Relying on makeshift methods often leads to poor results.
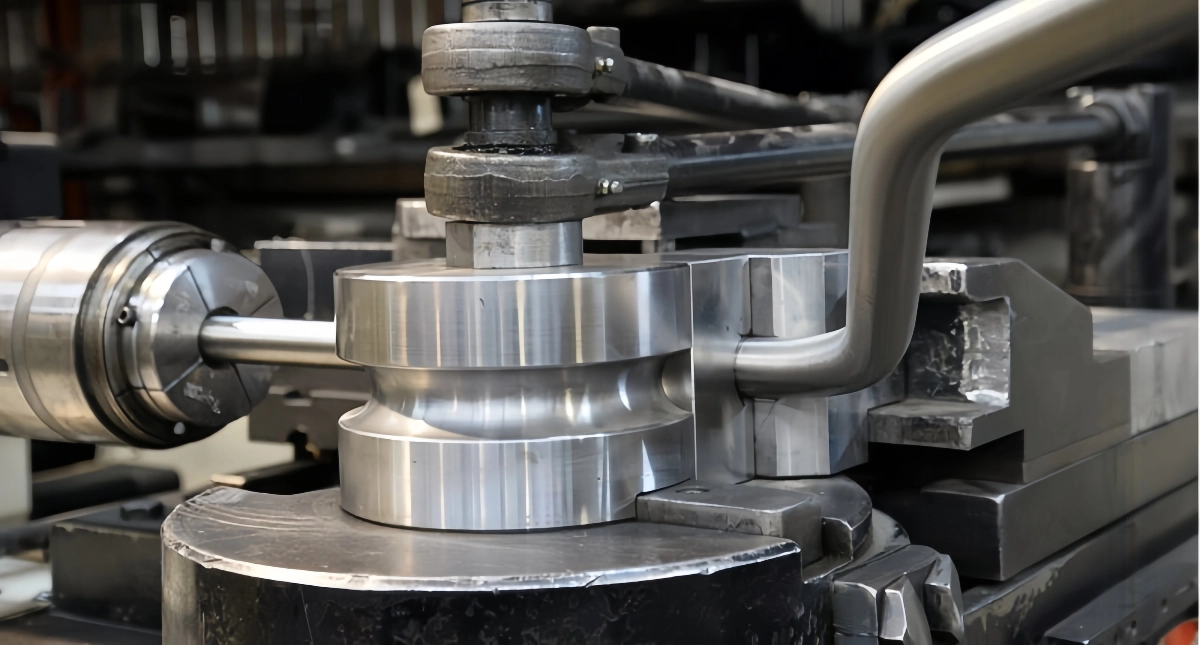
From a manufacturing standpoint, we use specialized tools like rotary draw benders, three-roll benders, or hydraulic press brakes with appropriate dies designed for the specific rod diameter and desired radius. Hand benders exist for smaller, softer rods.
Successfully bending aluminum rods, especially with accuracy and without defects, typically requires tools specifically designed for the task. The choice of tool depends heavily on the rod’s diameter, the alloy and temper, the desired bend radius and angle, the required precision, and the production volume. Makeshift methods using vises and brute force often lead to kinks, inaccurate bends, or fractures.
Common Bending Tools
Hand-Held Tube/Rod Benders:
Description: Manual tools, often lever-operated, designed for smaller diameter rods (typically up to 1/2 inch or maybe slightly larger, depending on alloy softness). They usually incorporate pre-formed grooves or dies for common radii.
Best For: Soft alloys (1100, 3003, soft 5052/6063), small diameters, non-critical bends, DIY projects, field repairs, low volume.
Limitations: Limited force capability, difficult to achieve high precision or tight radii on stronger materials, relies heavily on operator skill.
Rotary Draw Benders:
Description: More sophisticated machines (manual, hydraulic, or CNC) that clamp the rod and draw it around a rotating bend die. They often use internal mandrels (though less common for solid rods than tubes) and wiper/pressure dies to support the material during the bend.
Best For: Achieving high precision, consistency, and quality bends, especially with tighter radii or more challenging materials. Suitable for medium to high production volumes. CNC versions allow for complex multi-bend sequences.
Limitations: Requires specific tooling (dies) for each rod diameter and bend radius, higher initial equipment cost.
Description: Machines with three adjustable rollers (usually in a pyramid formation) that progressively curve the rod as it passes through them multiple times.
Best For: Creating large-radius bends, sweeping curves, arcs, spirals, or complete circles. Can handle a range of rod sizes depending on machine capacity.
Limitations: Not suitable for tight radii. Achieving precise start/end points for the bend can be challenging compared to draw bending.
Hydraulic Press Brakes (with V-dies or Radius Tooling):
Description: While primarily used for sheet metal, press brakes equipped with appropriate V-dies or specialized radius tooling can be used to bend rods, typically for simple angle bends rather than smooth curves.
Best For: Creating discrete angle bends in rods, often used for structural brackets or supports. Can handle larger diameters and apply significant force.
Limitations: Prone to marking the rod, may cause some flattening if tooling isn’t ideal, less suited for smooth, continuous curves compared to roll or draw benders.
Custom Jigs and Fixtures:
Description: For specific repetitive bends, custom-made jigs can be fabricated to guide the rod and ensure consistency when using manual or simpler bending methods.
Best For: Improving repeatability in low-tech bending setups for specific part geometries.
Limitations: Design and fabrication required for each unique bend.
Bend Die: The primary tool with the desired radius that the rod conforms to.
Clamp Die: Holds the straight section of the rod securely during bending.
Pressure Die: Applies pressure to support the rod as it’s drawn around the bend die.
(Optional) Mandrel: Internal support used primarily for tubing, but sometimes adapted for specific rod bending scenarios, though less common.
(Optional) Wiper Die: Supports the inside radius just past the tangent point to prevent wrinkling (more critical for tubing).
Choosing the right tool involves matching the tool’s capabilities (force, precision, radius capacity) with the demands of the specific bending task (material, diameter, bend requirements). Using undersized or inappropriate tools is a common cause of poor results.
What are common mistakes in bending aluminum rods?
Okay, I have the right tools and materials. What pitfalls should I watch out for to avoid making costly mistakes when actually bending the rods?
Having seen many attempts, common mistakes I notice include choosing the wrong alloy/temper (too hard), bending tighter than the minimum radius, using incorrect or damaged tooling, applying force too quickly, and inadequate support leading to kinks or fractures.
Bending aluminum rod seems straightforward, but several common mistakes can lead to undesirable outcomes like cracked parts, inaccurate dimensions, surface damage, or inconsistent results. Awareness of these pitfalls is the first step toward achieving high-quality bends.
Mistake 1: Incorrect Material/Temper Selection
Error: Choosing an alloy or temper that is too hard or not ductile enough for the intended bend radius or forming process (e.g., trying to make a tight bend in 6061-T6).
Resultado: Cracking or complete fracture during bending, excessive springback, requiring excessive force possibly damaging tooling or the part.
Prevention: Consult material specifications. Select alloys like 3003, 5052, or 6063/6061 in softer tempers (O, T4, Hx2/Hx4) for significant bending. Understand the trade-off between final strength and formability.
Mistake 2: Violating Minimum Bend Radius
Error: Attempting to bend the rod around a radius smaller than the material can safely tolerate for its diameter, alloy, and temper.
Resultado: High tensile stress on the outer bend surface leads to cracking or fracture. Severe compression on the inner surface can cause buckling or distortion.
Prevention: Always determine and adhere to the recommended minimum bend radius for the specific material condition. Use tooling with the correct radius. Generally, softer materials/tempers allow tighter radii.
Mistake 3: Using Improper or Damaged Tooling
Error: Employing tools not designed for the rod diameter, using worn or damaged dies (nicks, rough surfaces), or using makeshift setups (e.g., bending over a sharp edge in a vise).
Resultado: Kinking, flattening (ovality, though less pronounced in solid rods than tubes), surface damage (scratches, gouges), inaccurate bend angles or radii. Damaged tooling can create stress risers leading to cracks.
Prevention: Use tools specifically designed for the rod diameter and bend type (e.g., rotary draw bender dies, roll bender rolls). Ensure tooling is smooth, correctly sized, and in good condition. Use appropriate support dies (pressure die).
Mistake 4: Inadequate Material Support
Error: Failing to properly support the rod during the bend, especially near the bend zone (relevant to press bending or less sophisticated methods). For tubing, this includes omitting a mandrel when needed.
Resultado: Kinking, buckling, or collapsing of the rod profile.
Prevention: Use methods like rotary draw bending with pressure dies that support the rod’s shape. Ensure proper clamping. For tubing, use a mandrel for tight bends/thin walls.
Mistake 5: Incorrect Bending Speed
Error: Applying the bending force too rapidly, especially with less ductile alloys or complex bends.
Resultado: Increased stress on the material, higher likelihood of cracking or tearing. Reduced control over the final angle due to inconsistent springback.
Prevention: Use a smooth, controlled, consistent bending speed appropriate for the material and method.
Mistake 6: Not Accounting for Springback
Error: Bending the rod exactly to the desired final angle without considering elastic recovery.
Resultado: The final angle after releasing the force is less than intended.
Prevention: Understand that all materials exhibit springback. It must be compensated for by slightly over-bending the rod. The amount of over-bend needed depends on the alloy, temper, radius, and angle, often determined through trial-and-error or calculation using material data. CNC benders can often calculate and apply springback compensation automatically.
Mistake 7: Insufficient Lubrication
Error: Failing to use an appropriate lubricant between the rod and the tooling (especially bend dies and pressure dies).
Resultado: Increased friction leads to higher bending forces, surface galling, scratching, tool wear, and potentially tearing or cracking of the rod surface.
Prevention: Apply a suitable bending lubricant compatible with aluminum to reduce friction and improve material flow during deformation.
Avoiding these common errors through careful planning, material selection, proper tooling, and controlled technique is essential for successfully and accurately bending aluminum rods.
What is the minimum radius for bending aluminum rods?
I need a really tight curve for my design. How sharp can I actually bend an aluminum rod before it breaks or looks terrible? Is there a hard limit?
The minimum bend radius isn’t one-size-fits-all. Based on material specs I work with, it depends heavily on the specific aluminum alloy, its temper, and the rod’s diameter. Softer alloys in ‘O’ temper can sometimes handle near-zero radius, while hard T6 might need 5-8 times the diameter.
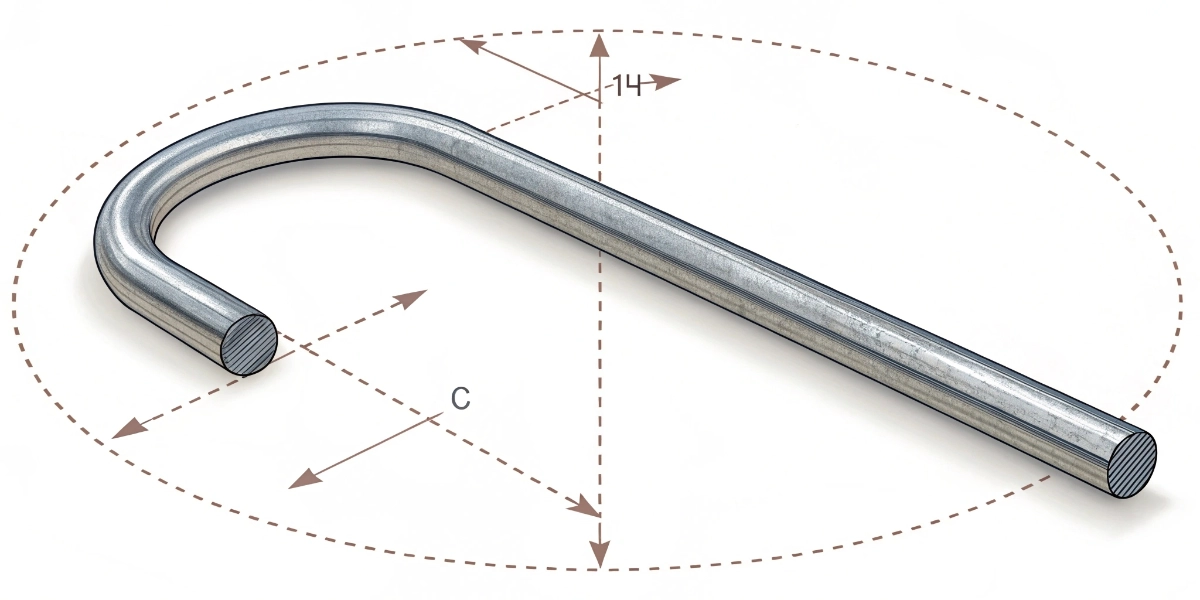
The minimum bend radius (MBR) is a critical parameter in designing parts with bent aluminum rods. It represents the smallest centerline radius to which a rod can be bent without causing unacceptable defects like cracking, excessive distortion, or significant weakening. Trying to bend tighter than the MBR is a common cause of failure.
Factors Determining Minimum Bend Radius
The MBR is not a fixed value but depends primarily on:
Aluminum Alloy and Temper: This is the most significant factor.
Ductilidad: Materials with higher ductility (higher elongation percentage) can withstand more stretching on the outer bend surface and compression on the inner surface, allowing for tighter bends. Annealed (‘O’ temper) alloys are the most ductile.
Strength: Higher strength alloys (like T6 temper) are less ductile and require larger bend radii to avoid fracture.
Rod Diameter (D): While often expressed relative to thickness for sheet/plate/tube, for solid rods, the diameter itself influences the strain. However, MBR is more commonly related to the material’s properties than directly to diameter, although larger diameters generally require appropriately larger radius tooling for smooth results. Often, guidelines are given relative to diameter (e.g., 2D, 3D radius).
Bending Method and Tooling:
Method: Precision methods like rotary draw bending with proper support can often achieve slightly tighter radii compared to simpler methods like press bending.
Acceptable Quality Level: The definition of an “acceptable” bend influences the practical MBR. If minor surface imperfections or slight flattening are tolerable, a slightly tighter radius might be used than if a perfect profile and finish are required.
General Guidelines (Approximate)
Providing exact MBR values is difficult as they depend on specific conditions, but general guidelines exist, often expressed as a multiple of the rod diameter (D):
Alloy / Temper Condition
Typical Minimum Bend Radius (Centerline)
Notas
Very Soft / Highly Ductile:
1100-O, 3003-O
~ 1D to 2D
Can often handle very tight bends close to sharp corners.
Soft / Good Ductility:
5052-O, 5052-H32
~ 1.5D to 3D
Very good formability, common choice for bent parts.
6061-O, 6063-O
~ 1.5D to 3D
Annealed state is very formable for these alloys.
Medium Strength / Fair Ductility:
6061-T4, 6063-T4
~ 3D to 5D
Bendable, but requires larger radius than O temper.
High Strength / Low Ductility:
6061-T6, 6063-T6
~ 6D to 10D+
Difficult to bend tightly, high risk of cracking.
2024-T3/T4, 7075-T6
Very Large / Often Not Recommended
Generally considered poor candidates for tight bending.
Important Caveats:
These are general guidelines only. Always consult specific material datasheets from the supplier or perform bend tests if possible.
The quality of the bend (smoothness, lack of cracks) is paramount. Pushing too close to the absolute minimum can compromise integrity.
These radii assume appropriate tooling and technique are used.
Practical Implications
Design Stage: Designers must consider the MBR early in the design process. Specifying a bend radius tighter than the material can handle will lead to manufacturing problems or require switching to a more formable (and potentially weaker) alloy/temper.
Manufacturing: Operators need to know the MBR for the specific rod they are bending and ensure their tooling and setup respect this limit. Compensating for springback also requires understanding how the material behaves at the chosen radius.
Attempting bends significantly tighter than these guidelines, especially with harder alloys or inadequate tooling, is highly likely to result in visible cracking on the outer surface or, in severe cases, complete fracture of the aluminum rod. Always err on the side of a slightly larger radius if unsure.
Conclusión
Bending aluminum rod difficulty varies with alloy, temper, and size. Proper tools like draw benders are key. Avoid common mistakes like exceeding minimum bend radii or using wrong tempers to prevent cracking and ensure accurate, reliable results for your designs.