Address
304 North Cardinal
St. Dorchester Center, MA 02124
Work Hours
Monday to Friday: 7AM - 7PM
Weekend: 10AM - 5PM
Address
304 North Cardinal
St. Dorchester Center, MA 02124
Work Hours
Monday to Friday: 7AM - 7PM
Weekend: 10AM - 5PM

Want seamless LED lighting that disappears into surfaces? Bare strips look messy, and surface mounts stand out. I understand the need for truly integrated, clean lighting solutions using a recessed aluminum profile in modern designs.
From my manufacturing viewpoint at ALUT, achieving this clean look involves using a recessed aluminum profile. We design these channels specifically to sit flush within grooves in ceilings, walls, or furniture, creating truly integrated, professional LED lighting installations that blend perfectly with the architecture.
These specific profiles offer more than just a hidden look; they provide essential functions for LED longevity and light quality. Let’s explore what makes a recessed aluminum profile unique and how to use it effectively to achieve that flawless finish clients demand.
Unsure what makes a profile ‘recessed’? Choosing the wrong type means a clumsy finish, not the seamless integration you want from a recessed aluminum profile. Let me clarify the key characteristics that define this type.
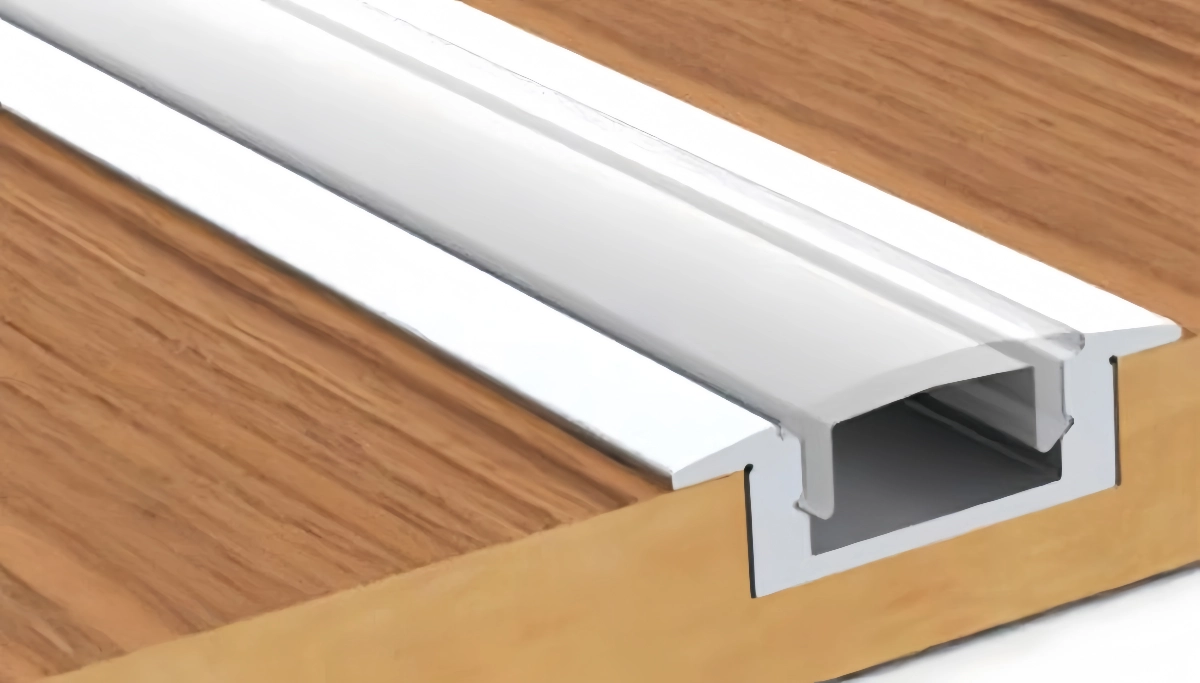
In my experience manufacturing these components at ALUT, a recessed aluminum profile is specifically designed with flanges or wings extending beyond the main channel body. We create these so the main body sits inside a pre-cut groove, while the flanges neatly cover the cut edges, ensuring a flush, truly built-in appearance on the mounting surface.
A recessed aluminum profile, sometimes called a flush-mount profile, is fundamentally different from a standard surface-mounted channel. Its defining feature is the design intended for insertion into a pre-prepared slot or groove in the mounting material (like drywall, wood panels, tile, or flooring). This integration is the core purpose of a recessed aluminum profile.
Understanding the difference is key:
| Feature | Recessed Aluminum Profile | Surface Mount Aluminum Profile |
| Installation | Sits inside a pre-cut groove | Mounted directly onto the surface |
| Appearance | Flush, integrated, built-in look | Visible channel sitting proud of surface |
| Key Design | Has flanges/wings to cover cutout edges | Typically has flat back for surface contact |
| Prep Work | Requires precise cutting of groove/slot | Simpler surface preparation (drilling holes) |
| Use Case | Architectural integration, clean modern lines | General purpose, easier retrofit |
Choosing a recessed aluminum profile requires extra preparation work, but the result is a sophisticated, integrated lighting effect highly valued in quality installations.
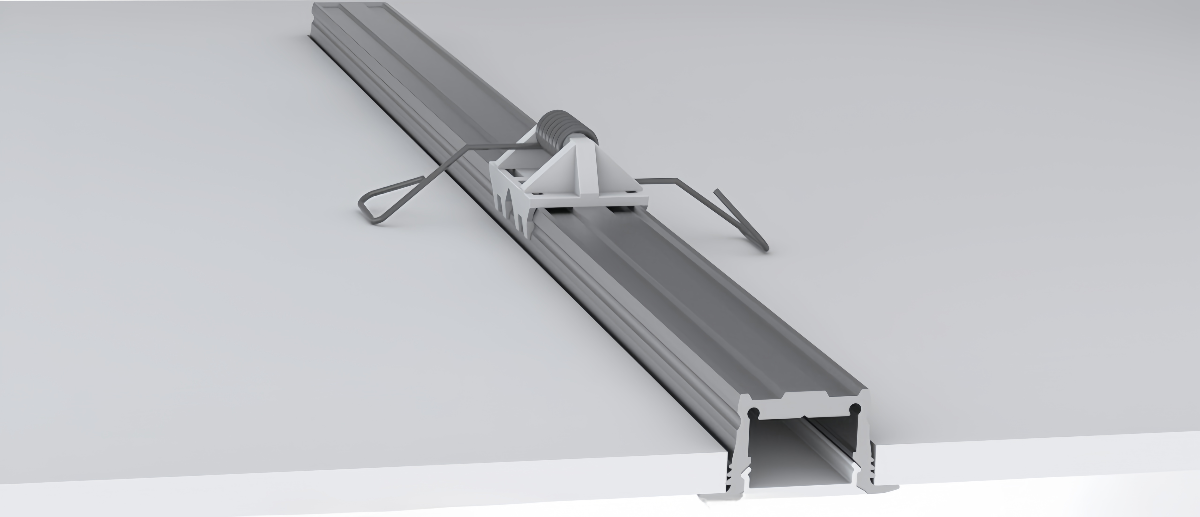
Worried about cutting into ceilings or furniture for installation? Incorrect installation of a recessed aluminum profile ruins the clean look and can damage expensive materials. I’ve seen the challenges; let’s outline the right steps for a professional result when installing this type of profile.
From overseeing installations integrated into products we supply, correct installation of a recessed aluminum profile involves precise steps. I emphasize accurately cutting the groove to the right depth and width, securely mounting the profile within it, installing the LED strip, carefully connecting wiring, and finally snapping on the diffuser cover for a neat, flush finish.
Installing a recessed aluminum profile demands more precision than a surface-mount channel. Achieving that seamless look depends heavily on correct preparation and fitting. Here’s a guide:
This is the most critical step for installing a recessed aluminum profile.
Taking care during each step, especially groove cutting, is essential for the professional, integrated result expected from a recessed aluminum profile.
Thinking recessed aluminum profile options are just for achieving a particular modern aesthetic? While they excel at that, you might miss out on significant functional advantages beyond looks alone. I know from supplying these solutions that a recessed aluminum profile offers much more.
Based on the custom and standard solutions we provide at ALUT, the benefits of using a recessed aluminum profile extend well beyond the desirable clean, integrated look. I see key functional advantages in providing superior heat dissipation critical for LED longevity, excellent physical protection for the delicate LED strip, enhanced light diffusion capabilities, and enabling highly professional lighting designs.
Opting for a recessed aluminum profile is an investment in both the form and function of your LED strip lighting installation. While requiring more installation effort, the advantages often justify the work, particularly in high-end projects. Let’s explore these benefits:
Here’s a summary table of the core benefits:
| Benefit Category | Specific Advantage | Impact |
| Aesthetics | Seamless integration, flush appearance | Cleaner lines, modern look, architectural feel |
| Functionality | Effective heat dissipation (heatsinking) | Extends LED lifespan, maintains brightness & color |
| Functionality | Physical protection for LED strip | Increases durability, reduces risk of damage |
| Light Quality | Diffusion via cover (frosted/opal) | Reduces hotspots & glare, creates uniform light line |
| Design | Versatile integration into various materials | Enables creative & sophisticated lighting designs |
Therefore, choosing a recessed aluminum profile delivers a superior combination of aesthetic integration and functional performance.
Confused by the different recessed aluminum profile options you see available? Selecting the wrong type might not fit your installation surface correctly or achieve the desired visual effect. Let me help clarify the main variations you’ll encounter when choosing a recessed aluminum profile.
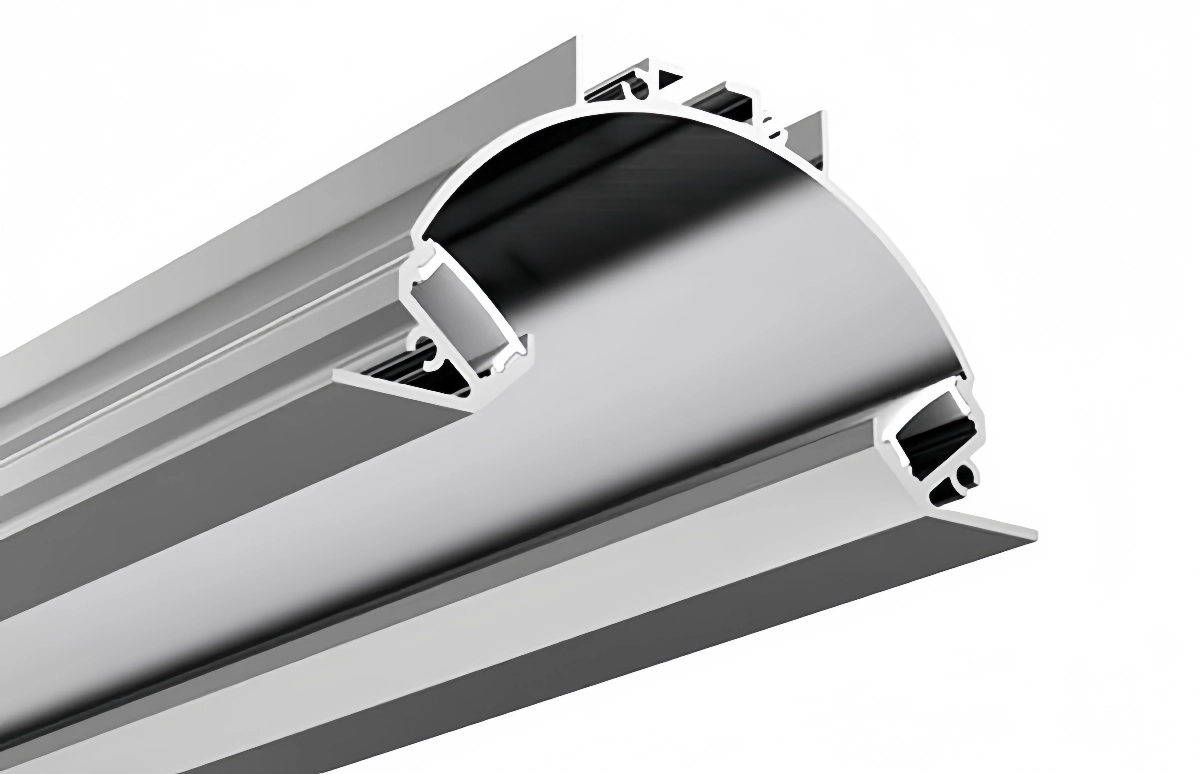
Having manufactured various types at ALUT for diverse B2B applications, I know recessed aluminum profile options primarily vary by their physical dimensions (width, depth), the style of their flanges or wings, and their suitability for specific installation materials like drywall, tile, or flooring. We produce slim profiles, wider ones, and specialized versions.
While all recessed aluminum profile types share the core concept of flush installation via flanges, manufacturers offer a range of designs. Understanding these categories helps you specify the right product, avoiding procurement errors. Key variations include:
Manufacturers offer recessed aluminum profile designs tailored for particular uses:
Visible surface finish options for a recessed aluminum profile usually include:
Here is a table categorizing some common types:
| Profile Category | Key Characteristic | Common Use / Advantage |
| Slim / Low-Profile | Shallow depth, narrow width | Discreet look, minimal groove depth needed |
| Deep Profile | Increased depth | Better diffusion (dotless effect), improved heatsinking |
| Wide Profile | Wider channel / overall width | Accommodates wider/multiple LED strips, bolder look |
| Trimless / Mud-in | Perforated flanges for plastering | Completely seamless look, frame becomes invisible |
| Floor-Rated | Heavy-duty construction, robust diffuser | Safe for foot traffic, pathway/floor integration |
| Tile Profile | Flanges designed for tile integration | Neat installation within tiled surfaces |
Choosing the right type of recessed aluminum profile involves matching its features to your LED strip, mounting substrate, and desired aesthetic. Consulting manufacturer specifications for the recessed aluminum profile is always recommended.
A recessed aluminum profile offers seamless aesthetics and vital LED protection. Correct type selection and precise installation are key to achieving professional, long-lasting, integrated lighting solutions with recessed aluminum profile systems.